Customer: The combination of customer number and customer name. This field also acts as a look up field if the direct job order method is being used, (creating a new Temp Job Order from scratch and not from a Client record.) For direct job order entry from the vertical menu, enter the first letter(s) of the client name and press tab. This will produce a selection list.
Status: Status refers to the status of the Temp Job Order. Click the field label for ease of code selection via list view.
|
Status Codes commonly found on the list view selection for job order include: | |
|
A – Active/Open C – Complete CC – Cancel Client CF – Client Filled CI – Cancel Internal CR – Cancel Rate D – Delete E – Cancelled before Fill F – Filled |
G – Cancelled after Fill L – Lost business/Other Firm Filled O – Other Office Filled/Unable to Fill at This Office P – Pending (Not Cancelled/Not Active) R – Refill TD – Transitioned to Direct Hire X – Do not Service ZZ – Credit Hold |
The Systems Administrator can add additional codes via Codes Editor if necessary.
The Status Code can be selected from the list view selection or keyed in.
Note: When a status of “C” for complete is selected on a Job Order, all of the “A” status assignments attached to the Job Order will automatically get coded to “C” for complete.
If you do not want to complete all of the assignments on a job order, complete (“C” status) only the assignment(s) to be completed. When all of the assignments for a job are complete, the job order status will automatically change to “C” for complete.
Taken By: Job Order Placement Consultant. This field is used for the initials of the temporary placement consultant who is being given credit for taking this Temp Job Order. Use the field label for ease of code selection via list view. This field defaults to the PC initials that are located in the TPC field on the Client record, but may be changed if desired.
Contact: The name and title of the person calling in the job order from the client site. This field can be free form entry, or use the field label for company contact selection via list view. If desired, the list may be set up to display the names of all contacts for customers grouped under the AMC code of the Customer Bill To Number for the current job order.
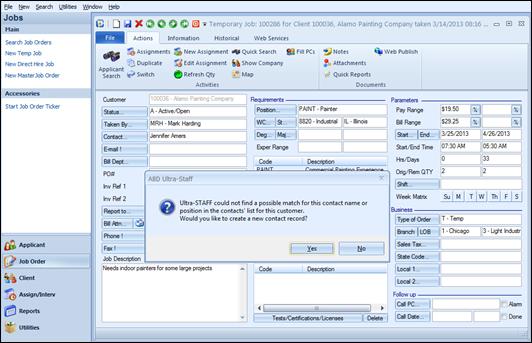
If a new contact name is entered and it currently does not exist in the Client Contact database, the following prompt will display:
The prompt to Save as a New Contact
Select YES if the contact should be added to the Client Contacts as a new Contact, or NO if it should not. By selecting NO, you will still be able to keep the name on this Job Order.
Email: This is the email address of the Contact. If the Contact already exists in the Client Contacts record, then the email address from the Contact record will default into this field. This address can be changed here if desired. Clicking the field label launches the user’s default e-mail program, and inserts the contact’s e-mail address in the To: field.
Bill Dept: This denotes the billing department that will be charged with this job order. This will default to the Job Contact’s billing department, but can be changed by using the field label to open the list view. This department, reliant on the Temp Invoice Format selected in the Client Bill Info, may print on the invoice. It is used for departmental invoicing.
P.O. #: This is the Client’s purchase order number that will print on the invoice. This is a size limited free form entry field. Avoid using special characters such as apostrophes and quotations.
Inv Ref 1 & 2: Invoice reference information to print on the invoice. These are size limited free form entry fields. The Inv Ref 1 and 2 fields will print directly beneath each pay code line on specific invoice formats.
Report-To: The name and title of the person the employee will report to if assigned to this job order. This field can be free form entry or use the field label for ease of company contact selection via list view. If desired, the list may be set up to display the names of all contacts for customers grouped under the AMC code of the Customer Bill To Number for the current job order.
Bill Attn: Billing attention contact. This
field defaults from the Client Policies form but can be changed by clicking the
field label. The list of Contacts will be displayed and may be selected
from. If desired, the list may be set up to display the names of all
contacts for customers grouped under the AMC code of the Customer Bill To Number
for the current job order. The system also features a  button to the left of the Bill Attn
field which can be used to change the billing address for this job order
only. These Billing Addresses originate from the Client Contact
record, where multiple contact addresses may be stored for this use.
Billing address changes made here apply only and exclusively to the
current job order. There is also a
button to the left of the Bill Attn
field which can be used to change the billing address for this job order
only. These Billing Addresses originate from the Client Contact
record, where multiple contact addresses may be stored for this use.
Billing address changes made here apply only and exclusively to the
current job order. There is also a  button to the right of the Bill Attn
field which is used to store the address and contact information for the actual
location of the selected job order. This Job Location will be added to the list
of locations for the client.
button to the right of the Bill Attn
field which is used to store the address and contact information for the actual
location of the selected job order. This Job Location will be added to the list
of locations for the client.
Phone : The Temp Job Order contact’s phone number. This field will first default from the Client main form. It will then change to the phone number found in the Contact Manager record once the Contact is selected in the Job Contact field. The number can also be keyed in with area code and phone digits, and the system will automatically format it. If you prefer, you can type in the phone number with the formatting.
The field label is an action button, which is used for automatic dialing from the workstation. The workstation must be set up for auto dial in order to utilize this feature.
Fax : The Temp Job Order contact’s fax number. This field will first default from the Client main form. It will then change to the fax number found in the Contact Manager record once the Contact is selected in the Job Contact field. The number can also be keyed in with area code and phone digits, and the system will automatically format it. If you prefer, you can type in the fax number with the formatting.
The field label is an action button which is used to launch the Fax Cover Sheet Generator. This feature allows for the creation of a Fax Cover Sheet, which can be defined on the fly, or saved as a default. This feature will be discussed in detail in a separate section of this manual.
Job Description: Detailed job description. This is a free form unlimited entry field.
Position: Position title. This is the Position title required for this job order. Selection of a position can also tie into the worker’s comp code selection. Click the field label for ease of code selection via list view.
WC/State: Workman’s compensation code and state. This is the workman’s comp code that prevails for this job order. This defaults from one of three places: the Client Policies, the Client Bill Rate form (if filled out), or the Position code. The field label is available for ease of code selection. To access the list view, click the WC… field label. Once a code is selected, a state must also be entered in the field to the right. Use the St… field label to access the state list view, or simply enter in the two character state code. There is an option setting to validate the Workman’s Comp Code and State against the Branch/Corporation entered on the Temp Job Order. With this setting, users can only select Worker’s Comp codes and States relevant to the Corporation associated with the current Branch code on the Job Order. Contact an ABD Support Representative for more information on implementing this feature.
Deg: (Degree): Educational requirement of the job. Use the field label for ease of code selection.
Maj: (Major): Course of study required by the job. Use the field label for ease of code selection.
Exper Range: Years of experience range. Enter the range of experience desired by the client for this job. These fields will only accept numeric entry.
Skills / Cat / Sub/Quick/Delete
These buttons will allow you to select Skills that are needed for this job, by skill code, category and/or sub-category.
To select skills by Skill code, click the Skills button. A list of skills will be displayed. This list can be defaulted to sort either by Code or Description. Contact an ABD Support Representative for more information. When selecting Skills, touching the first letter of the desired skill code on the keyboard will ‘jump’ to that letter, which speeds up the selection process. Select the skills desired and then click on the OK button. The selected skills will appear in the skills box. Multiple skills may be selected.
To select skills by Category, click the Cat button. A list of categories will be displayed. Select the desired category by highlighting it. Then, click the Sub button to list the sub-categories within the selected category. Select the desired sub-category, and then click the Skills button to display a list of skills under the category/sub-category selected. When selecting Skills, touching the first letter of the desired skill code on the keyboard will ‘jump’ to that letter, which speeds up the selection process. Click to highlight the skills desired and then click on the OK button. The selected skills will appear in the skills box. Multiple skills may be selected.
Another option for selecting skills by category is to double click on the desired category from the category list, to open the sub-category list. Then, double click on the desired sub-category to view the associated skills list.
To select skills straight from sub-category, click the Sub button. A list of sub-categories will be displayed. Highlight the desired sub-category and then click the Skills button to display a list of skills under the sub-category selected. When selecting Skills, touching the first letter of the desired skill code on the keyboard will ‘jump’ to that letter, which speeds up the selection process. Click to highlight the skills desired and then click on the OK button. The selected skills will appear in the skills box. Multiple skills may be selected.
Another option for selecting skills by sub-category is to double click on the desired sub-category from the sub-category list. This will open the skills list.
The Quick button allows for the entering of skills without the use of the list box. Once the Quick button is selected, a window will appear, prompting for the entering of the desired skill codes, separating them by a comma. To use this option, the skill codes must be known by the user.
To delete a skill, highlight the desired skill in the Skills box that is to be removed, and then click the Delete button. The skill will be removed from the skills box. Only one skill can be deleted at a time.
Tests/Certifications/Licenses: Select any tests, certifications and / or licenses required for this job. Click the Tests/Certifications/Licenses button to open the list view. Select as many as desired. If a code needs to be removed from the job order, simply click on the code in the window to highlight it and then click the Delete button that is next to the Tests/Certifications/Licenses button. The Systems Administrator can add codes to the list view via the Codes Editor module.
Pay Range: There are 2 fields available to show what the pay rate range is for this job. If there is not a range, and only a set pay rate, then the second field on the right does not need to be filled in.
The number that is entered into the first field establishes the default pay rate for every assignment added to this job, (however this can be overwritten on each assignment.) This is a numeric entry field. It will default from the Client Rates Table if the position code used on the job order matches one in the table.
Bill Range: There are 2 fields available to show what the bill rate range is for this job. If there is not a range, and only a set bill rate, then the second field on the right does not need to be filled in. The number that is entered into the first field establishes the default bill rate for every assignment added to this job, (however this can be overwritten on each assignment.) This is a numeric entry field. It will default from the Client Rates Table if the position code used on the job order matches one in the table.
Gross Margin Calculator: In each of the 4 Pay
Range and Bill Range fields, there is a button on the right with a percent sign
on it,  . This button allows the
access to the add-on module, Profit Analyzer Module (Gross Margin
Calculator). Refer to the section in this manual for details of this
product.
. This button allows the
access to the add-on module, Profit Analyzer Module (Gross Margin
Calculator). Refer to the section in this manual for details of this
product.
Start: Starting date of the job. Clicking the field label can access a calendar for date selection.
End: Last date of the job. Clicking the field label can access a calendar for date selection.
Start / End Time: The first field is for the time the employee has to arrive for work. The second field is for the time the employee can leave work. Ultra-Staff will automatically format the time if entered in HHMM format. The system will default to AM, unless a P is entered after the time. The system will then change it to PM. Military time can also be used for more effective time management. After entry, it is translated by the system and displayed in a non-military format for convenience.
Hrs/Days: The first field is for the number of hours per day the employee can expect to work. This is a numeric entry field. The second field is for the total number of days called for on this job. The system will default a figure into this field by calculating the number of days between the Start Date and End Date. This figure can then be overwritten if needed.
Orig/Rem QTY: The first field is the Original Order Quantity. This is for the quantity of people requested by the client to fill this job order. This is a numeric entry field. The second field is the Quantity Remaining. This is for the quantity of people still needed to satisfy the original order quantity. This number is calculated by reducing the original order quantity every time an active assignment is added to the job order. When the quantity remaining is equal to or less than zero (a negative number), the Status of the Job Order will automatically change to “F” for Filled.
Shift: Click the field label to access a list view of the available shifts in the system. Select the shift that this job order is for, if applicable.
Week Matrix: Use for selecting the days of the week the job is for.
Type of Order:
T- Temp - Use T if the Temp Job Order is a regular job. (This is the default selection.)
TH – Temp to Hire - Use TH if the Temp Job Order is a temp to hire job.
C - Contract - Use C if the Temp Job Order is a contract job.
M - Medical - Used with the add-on Medical module. This is explained in detail in a separate manual.
P - Payrolling - Use P if the Temp Job Order is a payroll only job.
Branch: The internal branch/office getting credit for taking this job order. The office number selected will tie into specific GL account numbers (if relevant). Click the field label for ease of code selection via list view.
LOB (Line of Business): This is the Line of Business that relates to this job order. This field defaults from the Client Policies; otherwise, the field label is available for ease of code selection via list view. The LOB is a required field on the Job Order.
Sales Tax: The sales tax code for this job order. This field defaults from the Client Policies or can be selected from a list view, by clicking on the field label.
State Code: State where the work for this job order is being performed. This field defaults from the Client Policies or can be selected from the field label.
Local 1/2: Local taxes for this job order, if they apply to this job, based on where the job is being performed. There are two Local fields available for use. These fields default from the Client Policies or can be selected from the field label.
Call PC: Call back PC. This is the Staff employee who is responsible for the follow-up on this job order. This is the PC whose daily planner will be updated with this job call back. The PC code may be typed in or click on the field label for ease of code selection.
Alarm: This checkbox will either enable or disable the reminder alarm in the daily planner, for this follow up event. Check the checkbox if the alarm is to be enabled, or keep the checkbox unchecked if the alarm is not desired.
Call Date: The first field is the follow-up date. This is the date the call back for this job order is to be done. Clicking the field label of this field will access a calendar for date selection. The second field is for Call Time. This is the time the call back for this job order is to be done. Ultra-Staff will automatically format the time. Military time can be used for more effective time management. After entry, it is translated by the system and displayed in a non-military format for convenience.
Done: Check this box if the follow-up has been completed. This can be used to search for unconfirmed jobs.