
The Daily Planner Auto Loader window has two distinct areas. First, the Contacts section, which allows for the selection of adding the items to a particular date or a selected range of dates.
Figure 2.4 – Client Contact Daily Planner Loader
The next area, Options, is where a Call Type will be selected, as that will automatically become the Call Type associated with the items when they appear on the consultant’s Daily Planner. The Managers Only: Assign to PC field is only active if logged in as the Ultra-Staff Administrator. If logged into Ultra-Staff as a user (no Administrator rights), this field is grayed out, and the Daily Planner Auto Loader will assign the items to the logged in user’s Daily Planner. At the top of the window the user name of the person logged in is displayed, so that there is no confusion.
The two checkboxes at the bottom, Add to Daily Planner as All-Day events and Automatic workload distribution over selected dates range (weekdays only), perform the following actions:
•Add to Daily Planner as All-Day events: Checking this box will take the items and load them to the Daily Planner as an ‘all-day event,’ meaning that it will appear at the top of the Day View in the Daily Planner.

Figure 2.5 –Daily Planner Loader – All Day Event
To allocate the items as an All Day Event, from the Search Results grid, access the Daily Planner Loader program, and check the Add to Daily Planner as All-Day events checkbox. Next, select the Date for these items to appear on the Daily Planner (in the Contacts area), then select a Call Type and PC code (if logged in as the Administrator) from the Options area and when done, click the Start button to begin the process.
When the process is complete, the Daily Planner will include the allocated items for each day within the range selected. The Day View will show the items at the top of the window, whereas in the Events View the items are coded as “Contacts list (from Loader)” so that there is no confusion as to where the items had come from. Also, they appear with a start time of 8:00am, which is the system default time.
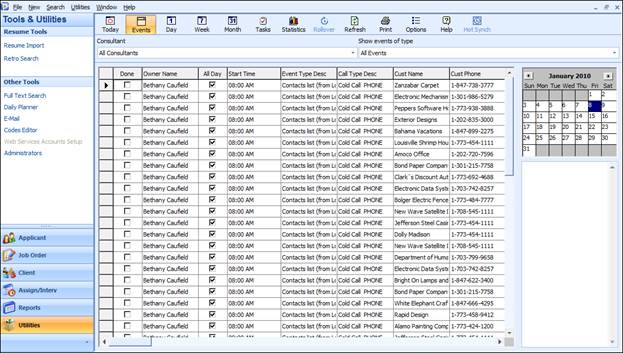
Figure 2.6 – Daily Planner Event View with All Day Events
•Automatic workload distribution over selected dates range (weekdays only). Checking this box will allow for the selection of a range of dates in the Contacts area so that the items will be evenly distributed over the date range selected.
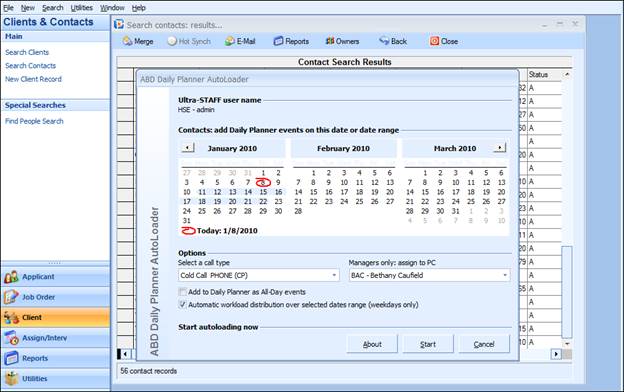
Figure 2.7 – Daily Planner Loader – Automatic Workload Distribution
To do this, simply check the Automatic workload distribution over selected dates range (weekdays mionly) checkbox and then in the Contacts area, click and drag over the date range for which the items are to be allocated. Then select a Call Type and a PC Code (if logged in as Administrator) and click the Start button to begin the process.
When the process is complete, the Daily Planner will include the allocated items for each day within the range selected. Note that the items are coded as “Contacts list (from Loader)” so that there is no confusion as to where the items had come from. Also, they appear with a start time of 8:00am in all views, which is the system default time.
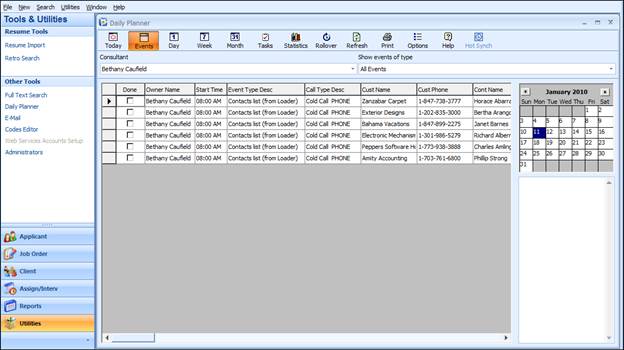
Figure 2.8 – Daily Planner – Automatic Workload Distribution Results – Event View
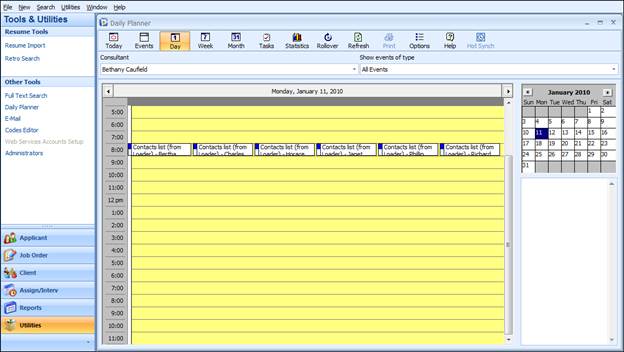
Figure 2.9 – Daily Planner – Automatic Workload Distribution Results – Day View