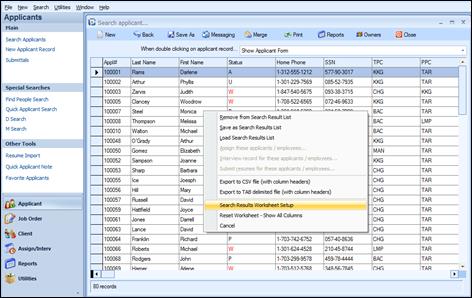
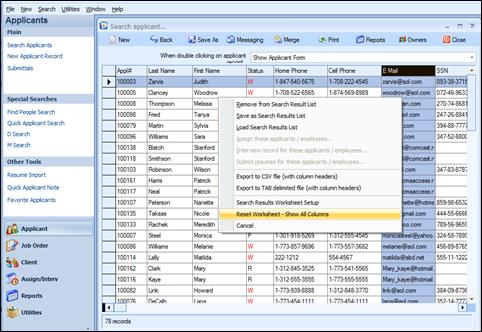
The Applicant Search Results grid can be formatted in a user selected layout. The columns within the grid can be hidden or displayed. The grid layout can be accessed by going into the main menu option Utilities>Options>Search Results Worksheet Setup>Applicant Search Results. The grid layout may also be accessed by doing a right mouse click within the search results list and selecting Search Results Worksheet Setup.
Applicant search results with right mouse click menu.
There are multiple options on the right click menu. For this exercise, click on Search Results Worksheet Setup. A new screen appears with a list of all 33 columns available for display. Users can create customized layouts to view the information which is most important to them. Simply check the box next to the column header that needs to be displayed.
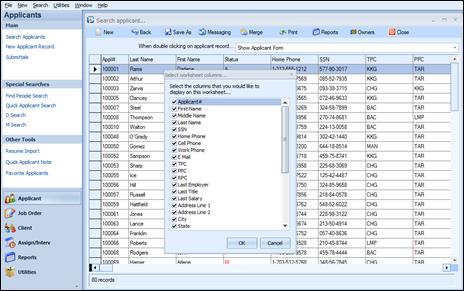
Applicant Search Results Worksheet Setup; Check or uncheck desired columns
|
1 |
The default setting for this grid has all 33 columns checked to be displayed. At this time, the user can check or uncheck the columns they wish to display. In this way they can customize their search results.
To restore the default setting, click on Utilities>Options>Search Results Worksheet Reset>Reset Applicant Search Results Worksheet or do a right mouse click within the search results list and select Reset Worksheet, Show All Columns.
Highlight the column and depress left side of mouse so red arrows appear
 Each column can be resized and the columns can
be reordered by dragging the column headers with the mouse. Highlight the
entire column and then by clicking on the column header again, two red
arrows will appear. Drag the column header to the desired location.
Each column can be resized and the columns can
be reordered by dragging the column headers with the mouse. Highlight the
entire column and then by clicking on the column header again, two red
arrows will appear. Drag the column header to the desired location.
To reset the grid results to display all the default columns, run an Applicant search, right click and select Reset Worksheet – Show All Columns. This will restore the grid to its default layout, displaying all available columns in their default position.
Reset to default display from right click menu
This can also be accomplished from Utilities on the horizontal menu.
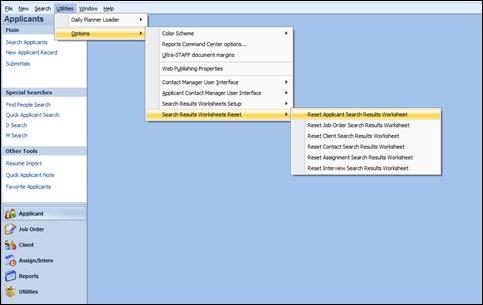
Reset the grid to its default display by selecting Reset Applicant Search Results Worksheet
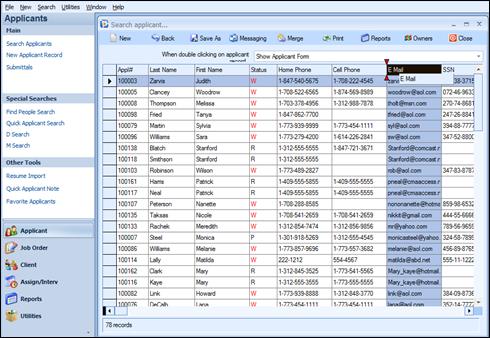
Users can also lock the columns for easy scrolling. In the lower left of the results grid there is a small black rectangle, shown below. Place the mouse pointer over the rectangle and depress the left mouse button. A small double arrow will display. Continue depressing the mouse and drag that arrow to the right, creating a split screen within the results grid. Release the mouse when the desired split location is reached.
In the example below, the left portion of the screen displaying the applicant #, applicant last and first names, is now locked. This enables users to scroll through the columns on the right side of the screen, while the applicant number and name remain in place.
![]()
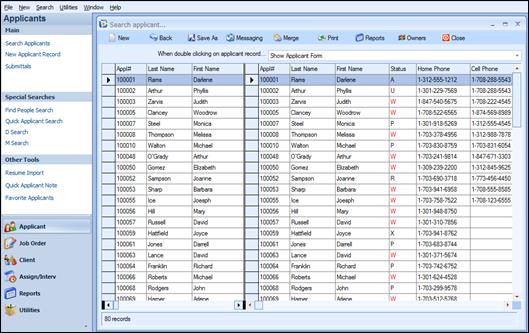
Results Grid with Locked Columns
Applicant Search Results Form
The Applicant Search Results screen has the ability to save and reload the results of the search, as well as export them to a file. When in the results view pane, performing a right mouse click in the list will display the following window:
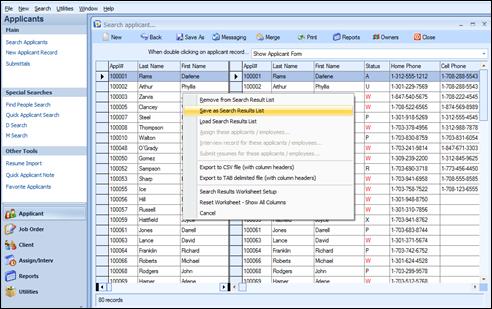
Right mouse menu in Applicant Search results
The menu options are described below:
Remove from Search Results List: This option allows the removing of a highlighted or multiple highlighted line item(s) from the listing.
Save as Search Results List: This option allows the saving of the names on this list to a file for repopulating at a later date.
Load Search Results List: The results that were previously saved can be reloaded; this is useful for retrieving the exact results content that were obtained from a previous search. The reloaded results are placed in the results grid to allow for easy access to the information.
Export to CSV file (with column headers): This option will prompt users to save as a CSV file for future use.
Export to TAB delimited file (with column headers): This option will prompt users to save as a TAB delimited file for future use.
Search Results Worksheet Setup: This option allows the hiding or displaying of a grid column.
Reset Worksheet-Show All Columns: This option allows the reset of the default grid column layout.
Cancel: Click Cancel to remove the menu.

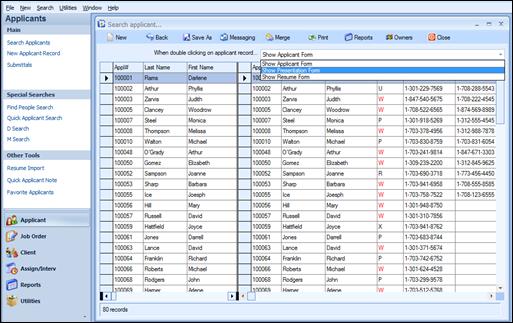
Applicant Record display options
 At the top of the Applicant search results
form, users can select the view that will be displayed when double clicking on
an applicant name. The choices are Show Applicant Form; Show Presentation
Form and Show Resume Form. The selections are made from the list
view. For example, if the Show Resume Form is selected, each time a user
double clicks on the applicant line, the Resume form will display. This is
an effective way to scroll through Applicant resumes.
At the top of the Applicant search results
form, users can select the view that will be displayed when double clicking on
an applicant name. The choices are Show Applicant Form; Show Presentation
Form and Show Resume Form. The selections are made from the list
view. For example, if the Show Resume Form is selected, each time a user
double clicks on the applicant line, the Resume form will display. This is
an effective way to scroll through Applicant resumes.